After having no luck with the engine today I decided to see if I could get the driver’s window moving again. Before I got started I pulled up the mats on the floor to have a good look. I found some rust on the driver’s side that looks like it went through the floorpan and opened up the channel of the x-brace. I am not terribly worried about this as the passenger’s side looked fine and the x-brace looked fine. I am going to get down to bare metal this winter with it so I will make a new floor and clean up and paint everything that is metal down there. I can’t tell if the black stuff was some kind of tar to stop the rust or the layer that I read was under the rubber mats. Whatever it was, it has passed it’s useful life.
So the first step in fixing this window was to remove the door panel. It is secured by small screws with fancy washer that go all the way around the sides and bottom, the door handle and the window crank. The screws were easy enough but It took me a few minutes to figure out the window crank. There is a nylon ring between the crank and the door panel. If you separate those two things you will see the top of the retaining clip that hold the handle to the crank post. The top of the clip faces the opposite direction that the long end of the handle does. So, if the handle is to the left, the clip will be on the right.
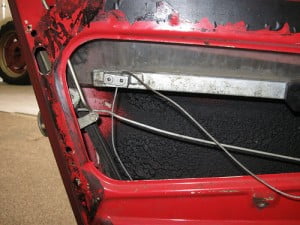
Once inside I felt around to find all of the guides and pulleys that make this system work. there are two pulleys at the top, two at the bottom, an adjustable pulley to put tension on the wire and the regulator that has the wire wound around it that the crank connect to. Right away I could see the problem. The wire had been crimped. It probably jumped out of it’s track and went between the regulator and the mounting bracket that the regulator is fastened too. I have 2 other regulators in the boxes of parts and upon inspection of them, their wire appeared to have the same problem. I attempted to straighten the wire and put it back on the guides. No luck. The crimping was so bad that it had broken sever strands in several places. It was not going to straighten. Besides, I just couldn’t figure out the path that the wire was supposed to take.
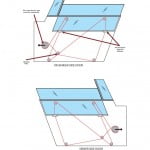
The passenger’s side works so I pulled the door panel from it and documented the path of the wire. I have created a diagram and place it in the Documents section.
So, I need a new regulator, or a way to repair on of the three broken ones I have. I can’t help but think that a change of material might fix this problem for good. Really you would just need a strong enough wire to raise and lower the window. It likely only weighs 5 pounds or less. I read in a document I found in the Fiat 850 Yahoo group that the wire is 2 mm. I should be able to replace it with a nylon coated wire and never have to worry about it again. The nylon might wear through due to friction on the pulleys at some point but I would bet it would take a long time. There are two point at the bottom of the window where the wire passes through and is secured tightly, nylon should not be a problem there.
I think I will try it.


